Beauty Blog: The secret to a great eyeshadow look

So, do you want to know the secret to a great eyeshadow look? I’ll tell you. It’s blending. Yep, if you’ve ever taken an art class then you are probably one step ahead of the game. Just like in art, you need to blend colors together to make them simultaneous, you’ll also need to do the same for eyeshadow.
Another way of looking at it is with the ombre effect. You need to blend the middle in order to get a seamless effect.
So let’s get started!
Here are some things that you will need:
1. Eyelid Primer: This helps to make your eye makeup last and it helps to bring more intensity to shadows. I used Urban Decay Primer Potion but Milani Eyeshadow Primer or ELF Essential Eyelid Primer is great for beginners.
2. A powder that matches your skintone. You can use a skintone eyeshadow powder if you’d like. But you just need some kind of powder to dry off the primer. I’ve found that setting the primer with a eyeshadow or translucent powder in this case, helps the eyeshadows go on smoother. It also helps it from clinging to the eyelid.
3. A palette. I have here the LORAC Pro Palette. It’s a bit expensive, but something like Maybelline the Nudes would work for beginners or the Wet n Wild Coloricon 5 pan palette in The Naked Truth will also work. You just basically need a light shade, a medium shade and a dark shade.
Instructions:
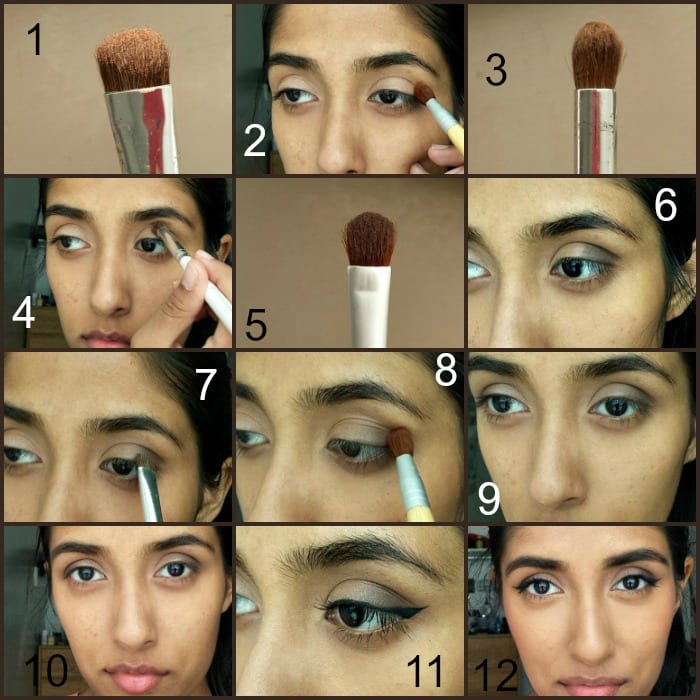
After you’ve primed your eyes, take a big fluffy brush like shown above and pat it onto your eyelid.
Now let’s begin the blending process!
I created a collage, because I had so many images! Hope it’s not too small!
-
Take your light color and pack it all over the eyelid using an eyeshadow brush. I used Lt. Bronze in the LORAC palette (I’ve labeled all the shades, so you can reference back. It’s #1)
-
Take that fluffy brush that we used before and use it to sweep it back and forth into the crease. The crease is the part between your eyebrow and the start of your lid.
-
Take a medium shade, I used Taupe (#2) and blended that into the crease with a small crease brush. This gives soft definition and will help with the process of blending in the darker shade.
-
Blend it well, you want it to fade out.
-
Take a dark brown I used Espresso (#3) and pack it onto the outer corner.
-
This is the outer corner, and this is how it should look like.
-
Take the first eyeshadow brush we used to pack on the light color and kind of sweep it into the darker color. This will help it blend. Don’t add any extra color to that brush. We just want to fade the colors together.
-
Take that big fluffy brush and blend the darker color into the crease, this helps to blend it out further and sort of smoke out the look.
-
This is what it should look like so far.
-
A direct view.
10a. This is where if you feel like you lost some of the lighter color, go back and add in more. Same for the dark color. Do this until you feel satisfied.
-
I added a winged liner and some mascara. I also added a browbone highlight (#4) and a inner highlight (#5) which is completely optional.
-
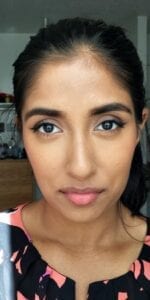
The complete look!
Here’s a closer look at it:
Somayea is a junior at UT and an aspiring beauty blogger.
Edited by Jessica Carr

