Beauty Blog: Brush Cleaning Basics
Last week I told you about the basic brushes that you should start out with. This week, I will be showing you how to clean them.

Welcome back, I hope you had a wonderful week. Last week I told you about the basic brushes that you should start out with. This week, I will be showing you how to clean them. Even if you’re a beginner you may have some dirty brushes lying around and that’s kind of gross. More importantly, it can affect your skin because essentially you are putting old makeup on your skin which can lead to acne. I will be sharing more information in a future post about proper techniques for removing makeup, as well as knowing the appropriate frequency for how often to use waterpik, as both of these practices are crucial for maintaining healthy skin
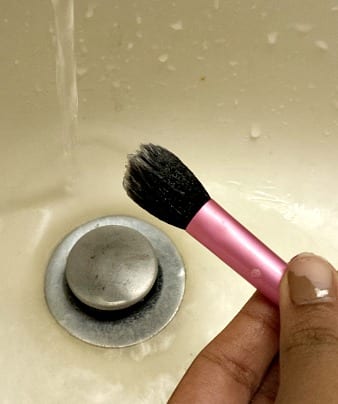
the culprit in questioning
So first things first (I’m the realest. Just kidding, I hate that song) here are the supplies you will need:
• Soap. You can use dish soap BUT I recommend getting Dawn Hand Renewal with Olay because it’s suppose to keep your hands soft. It’ll help cleanse your brushes but also keep them nice and soft.
I use the Dr. Bronner Castile Soap in Lavender in a travel size. You can find a travel size at Target. That’s great for someone who isn’t used to cleaning brushes.
• A towel to dry them off.
• Warm water. Don’t use hot water for two reasons. One, it’s not good for your hands. I have over 20+ brushes and by the end of my cleaning session my hands are dried out. Two, it can ruin your brushes by melting the glue that keeps them together and damaging the bristles.
I’m going to jump straight into it, so gather your materials.
Step 1: Place a little bit of soap onto one of your hands. I am right handed, so I put a small (like a small dot) onto my left hand.
Step 2: Wet your brush.
Step 3: Take your brush and swirl it into the soap. This way it helps to distribute the soap and really clean it.
Step 4: Gently squeeze out the soap from the brush. You should see colored foam come from the brushes. That is the old makeup sitting around.
Step 5: Wash your brush thoroughly. This is kind of a tricky one. But I would say spend about a minute under the sink rinsing it out. Afterwards, squeeze the brush a bit to get excess water out. Like how you would wring out your hair to get excess water out.
Step 6: Lightly swirl your brush into the towel. This will help get any extra moisture.
Step 7: Lay your brushes flat on your towel. This will make sure any moisture doesn’t get into the glue of the brush.
Repeat Steps 1-6 until all of your brushes are clean.
Step 7: After your done, put your brushes somewhere AWAY from moisture (aka somewhere away from direct heat or air condition). I’ve made the sad mistake of putting my brushes in my room where my air conditioning is and they don’t dry.
brushes so clean, mhmmm.
Another note is to do brush cleaning at night. This helps them COMPLETELY dry by morning.
However there is another method:
Spot clean: which is essentially quickly clean in between usage. Makeup Artists do this on set and now that NYFW (New York Fashion Week) is underway, you can bet that many makeup artists are using this technique.
There are two ways of doing this:
1. One is using a baby wipe or makeup remover wipes to wipe away excess product. There are also brush cleansing wipes, that you can use. They are a bit pricey for what it’s worth it.
2. Mixing your own “spot cleaner”. This method is using Isopropanol Alcohol (70%) and filling it up in a small spritz bottle and spritzing it into a paper towel and wiping your brushes with it. Again many companies do these from ELF to MAC. Google “spot cleaning makeup brushes” and you can find a variety of tutorials that will fit your fancy. This method is used my makeup artists because it helps to disinfect any bacteria.
Please, please do not use this method as the sole way of cleaning your brushes. You can do this method, but you will need to deep clean (use soap and water) your brushes. The reason is spot cleaning just gets rid of colors on the surface so you can move onto the next color without it looking all muddy and your look being one big glob. It does not get deep into your brushes and product will still build up.
I hope you found this week’s beauty course to be useful!
See you next week, where I shall show you how to blend eyeshadows. The key factor is perfecting an eye look!
Somayea is a junior at UT and an aspiring beauty blogger.
Edited by Jessica Carr
