3 Simple and Cute Treats for Halloween
Kayla Marcum gives three cute and fun Halloween recipes that everyone can enjoy.
As Halloween is only two days away, it’s that time to Google late-minute costume ideas, run to the grocery store for candy and most importantly, look for some fun treats to make for your festivities.
But, who really has the time to sit on Pinterest for hours looking for the best sweets the internet has to offer? I have gathered three simple and festive treats for you that will charm your guests and get them in the spooky spirit!
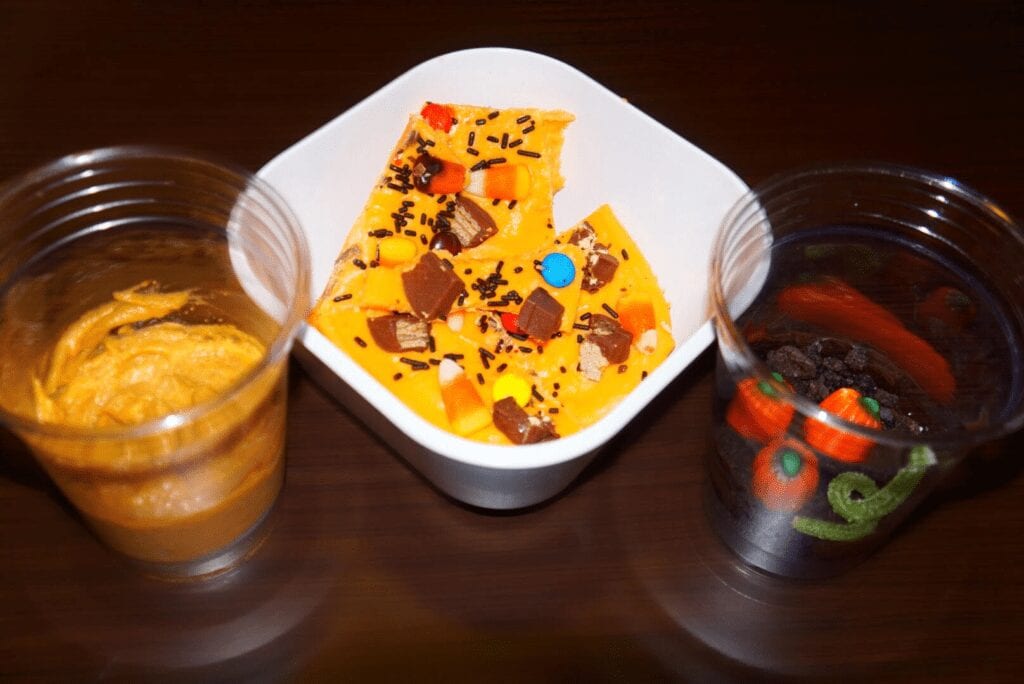
This is a delicious dessert that feeds into all of our inner pumpkin spice dreams! You can either put it in plastic cups and serve it as a dessert cocktail, or put it in a pan and serve it for a nice dinner.
Estimated Time: 20 minutes to make and 2 hours to chill in the refrigerator.
Ingredients:
Jello No-Bake Cheesecake and Crust Mix
Pumpkin Puree (15 oz. can)
1 teaspoon of all spice
1 teaspoon of cinnamon
1 cup of milk
3 teaspoons of sugar (Or a sugar substitute)
1 tablespoon of butter
Cool Whip (optional)
Plastic cups (optional)
Steps:
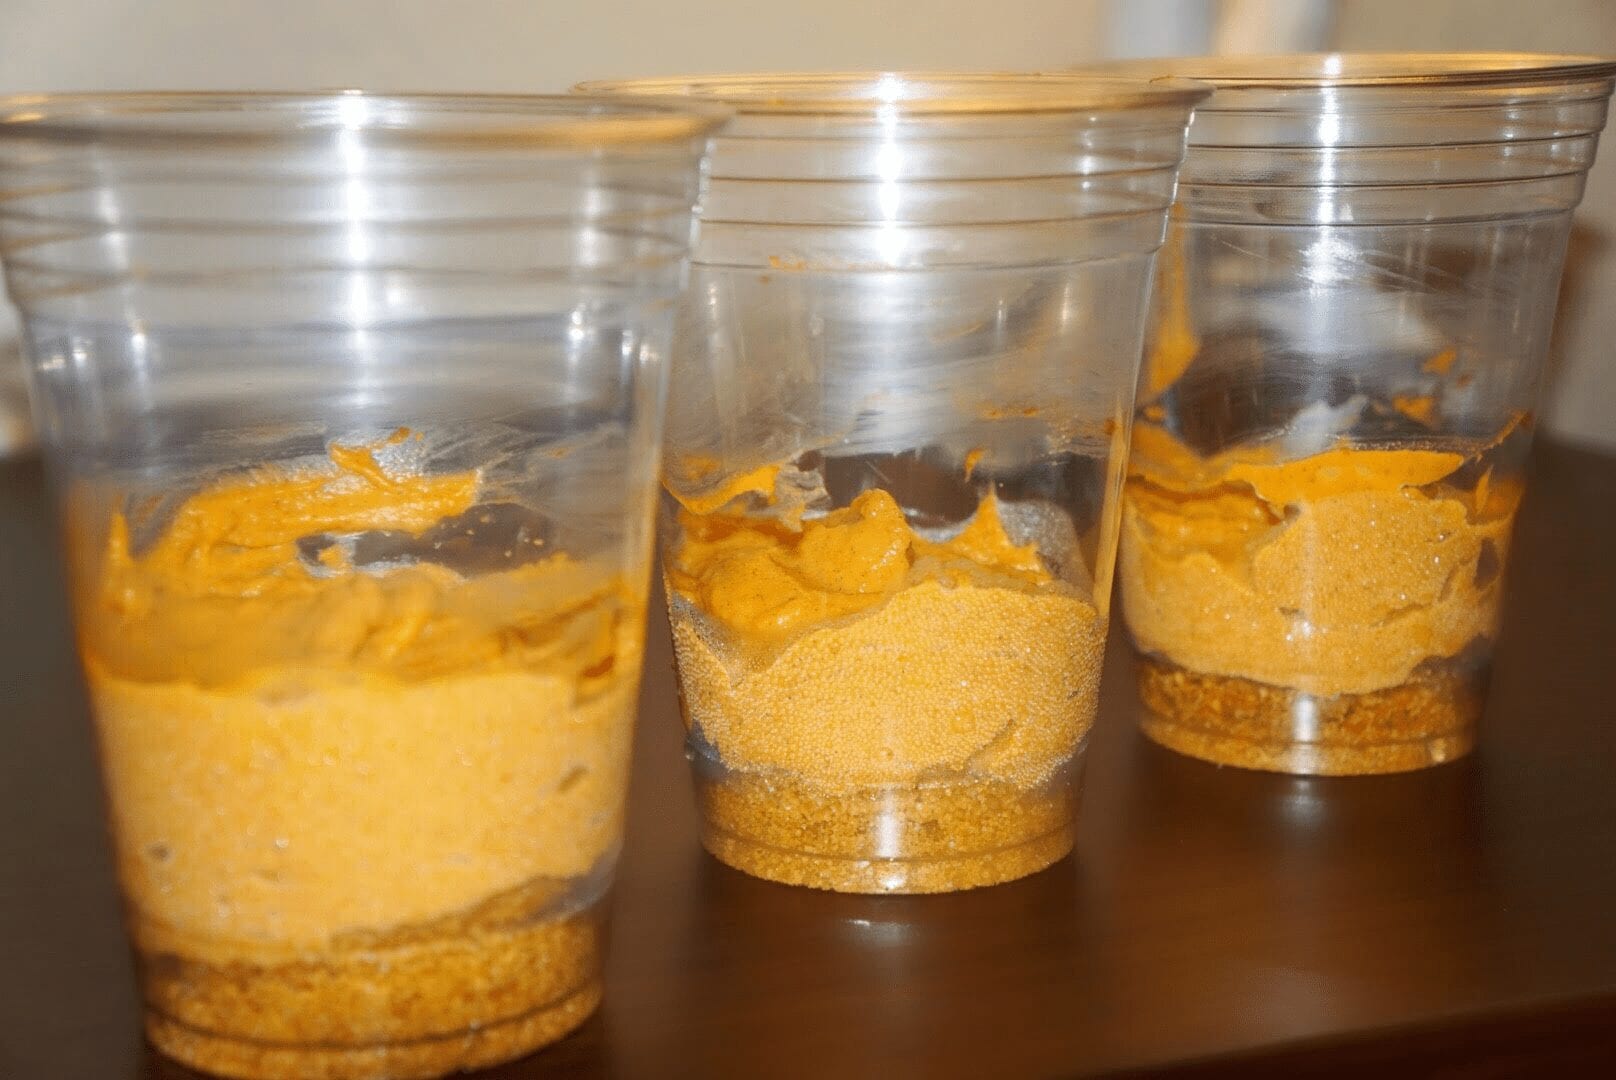
1. To begin, mix the crust mixture with the two tablespoons of butter and 1 teaspoon of sugar. You can add more butter if you like. The Jello box suggests 5 tablespoons, but for this recipe, you don’t have to have the crust moist if you don’t prefer. (I enjoyed the consistency of the dry graham cracker mix with the texture of the pumpkin cheesecake.)
2. Mix the cup of milk with the cheesecake mix. After you have thoroughly mixed those two ingredients, add the pumpkin puree.
3. Add the 1 teaspoon of all spice, 1 teaspoon of cinnamon and 2 teaspoons of sugar to the cheesecake mixture.
4. Lastly, gather the plastic cups or whatever you would like to put the cheesecake in, and layer the crust at the bottom and cheesecake mixture on top. For reference, I put two tablespoons of crust on the bottom and then two tablespoons of cheesecake mixture on top; but, if you like a less even ratio to crust-cheesecake, then add more or less of the crust and cheesecake! Then place it into the fridge for a couple hours to let it chill.

Reminiscent of my elementary school years, this is a must-have for my friends and I at all of our Halloween parties. This is the quickest and cheapest of the three recipes, but the taste is still as heavenly. Good for Halloween parties for five-year-olds and college students, this recipe is a win-win all around.
Estimated Time: 15 minutes
Ingredients:
Oreos
Chocolate Pudding (You can either make your own or buy pudding that is already made.)
Pumpkin Candy Corn
Green Sour Patch Straws (optional)
Plastic Cups
Steps:
1. If you decided to make your own pudding, then you would just need to prepare it first so it has time to chill in the refrigerator or freezer.
2. Crush the Oreos. If you can find pre-crushed oreos at the grocery store, this will save you a lot of time as this is the most time-consuming step. What I initally did was put the oreos in a ziplock bag and used the end of a screwdriver to crush them, but I found if I put the Oreos in the plastic cups and used the end of a utensil to crush them that it was quicker. There are other methods on the internet to crushing oreos if neither of these work for you!
3. Layer the oreos and pudding in an order and ratio that you like. I layered the oreos first, at the bottom, and then the pudding with a ratio of 2:1 oreos and had two layers of each. Lastly, after layering your oreos and pudding, just place your pumpkin candy corn on top and add the green sour patch straws!
 Halloween White-Chocolate Bark
I vote this one as the most fun and frustrating to make. The decorating part is very gratifying, however, the waiting for the chocolate to melt part is quite the opposite. If you are trying to challenge yourself and work on your patience, this is perfect as that is exactly what you will need for when you are melting the chocolate. If you also just want a cute treat to sit on your counter at your party, this is perfect, as well. Easy to make look good and simply delicious, this is definitely one of the best Halloween treats out there!
Estimated Time: 30 minutes to make and 20 minutes to chill in freezer.
Ingredients:
White Chocolate Chip Morsels
Orange Food Coloring
Candy Corn
Assorted Chocolate Candies (I used Snickers, M&M’s and Kit-Kats)
Sprinkles
Steps:
1. Heat the white chocolate. This is a tedious step and you will have to keep a watchful eye. Take a glass bowl and place it on top the pot on the stove. This creates a double barrier for the chocolate to warm and making it less likely to burn. Set the stove on medium heat and put the chocolate in the glass bowl. Stir the chocolate throughout the entire process, like I said, you will need to keep a careful eye on the chocolate as it can burn very easily. It will take 15-20 minutes for the chocolate to fully melt. You can add a dash of milk to help the chocolate to melt, but add the tiniest bit because adding too much will make the chocolate difficult to freeze.
2. Add the orange food coloring to the chocolate while it is still on the stove. It is important that you do not remove the chocolate from the stove before you are prepared to do the future steps, as the chocolate will harden very quickly. Add as much food coloring as you wish, the more food coloring the darker the orange of the bark will be.
3. Once the chocolate is melted and the food coloring is added, prepare what you will lay the chocolate on. I put wax paper down on a plate, but you can also use Pam to spray a plate or baking sheet.
4. Take the glass bowl off of the stove and pour the chocolate onto your platter. Smooth the chocolate out into any shape you would like, but I will warn you that the bark does not cut off clean so your shape may not remain.
5. Lastly, the fun part! Decorate your bark any way you like, just try and do it as quickly as you can! I added chocolate sprinkles, Kit-Kats, Snickers, M&M’s and candy corn to mine! Make sure to press your decor down hard into the chocolate so it will not fall off later, and then place your bark into the freezer for twenty-thirty minutes!
Images by Kayla Marcum
Edited by Kaitlin Flippo